home MEGACART Mk II Multicart tape restoration cartridge case news Mk I Multicart Mk 0 Multicart credits contact us buy
The Great Sega SC-3000 / SC-3000H / SG-1000 Cartridge Case Project
Last Update: 7 December 2012
Index
- The Finished SC-3000 Survivors Cartridge Cases... 7 Dec 2012
- Summary... 4 Aug 2012
- Adventures in Moldmaking... 2 Aug 2012
The Finished SC-3000 Survivors Cartridge Cases... 7 Dec 2012
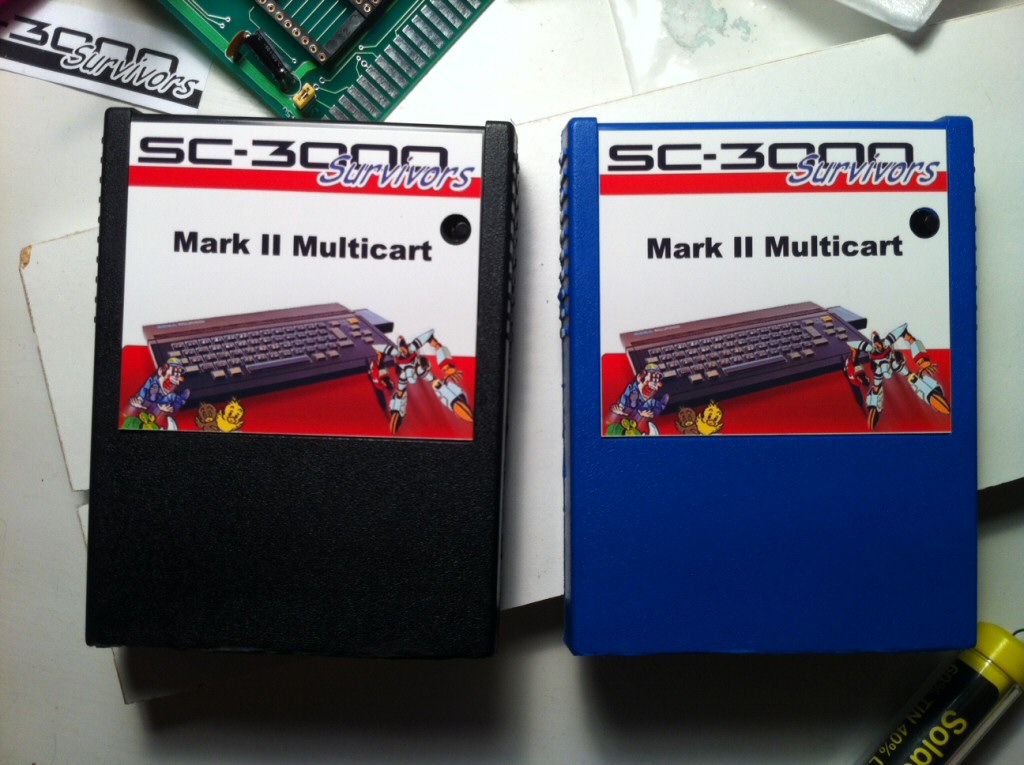 blue and black cartridge cases (front)
Hi All.
Unfortunately we didn't have time to keep updating this record as we went. So to cut a long story short, we can now make our own SC-3000 Survivors cartridge cases. All Multicarts now ship with a case.
Update: 29 Sept 2021 :We are no longer doing the custom moulded cases, but we now provide a 3D printed case with the Megacart and a cool vinyl label.
Check out the buy page if you want to order a Megacart..
But if you want to see how we made the orignal cases then keep reading. That was heaps of fun :)
One thing - if you try to make your own moulded cases, WEAR EYE PROTECTION. You could damage your eyes badly if you splash some resin in them. And read any safety warnings on your casting products about ventilation and wearing gloves carefully.
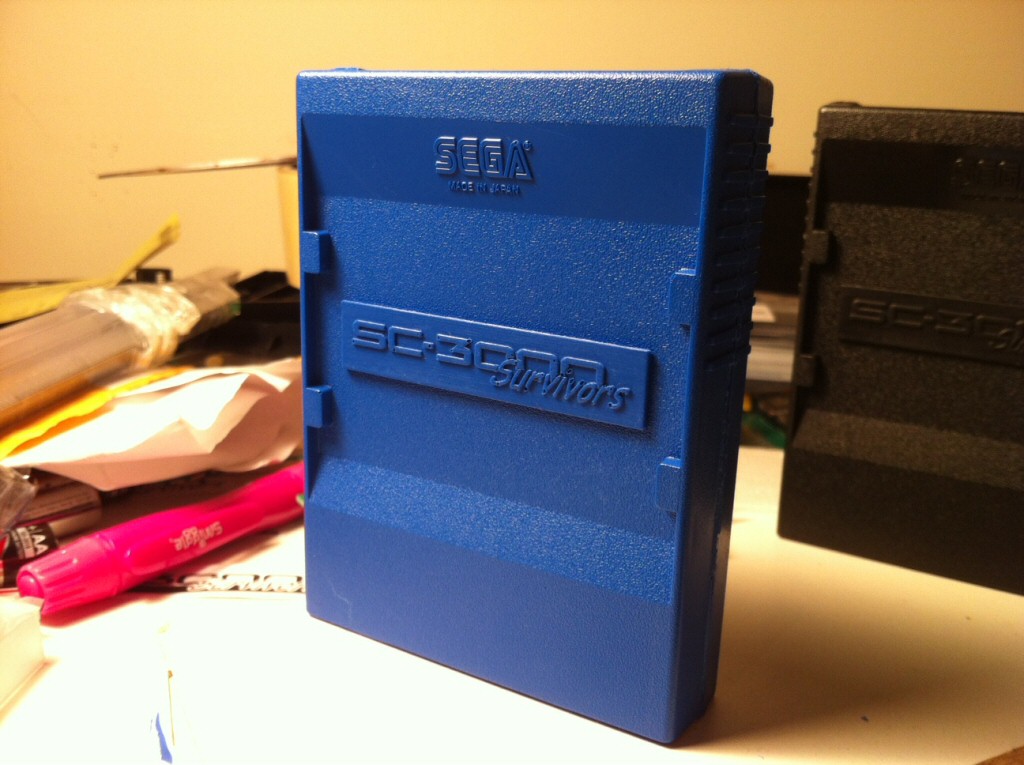 blue and black cartridge cases showing SC-3000 Survivors logo (rear)
Check out the cool 3D SC-3000 Survivors logo on the back of the cases. We made a little 3D model and had it 3D printed at Shapeways. Then we glued it to the back of the original cart when we made the mould.
Here is a YouTube video of the first completed cart case
And if you're really keen, here is the entire series we made whilst developing the moulds for the cartridge cases. If you ever want to try this yourself, it is a pretty good how-to guide. It isn't difficult, but it does require a lot of time, effort, and planning. And a bit of cash. The current cost of the case project up to this point is probably around $500USD :) And be aware that the process I've used isn't ideal for manufacturing large numbers of cases. It sure was fun though :)
- SC-3000 Cart Case Part 1 - Adventures in Moldmaking
- SC-3000 Cart Case Part 2 - Mixing Pinkysil and pouring the mold
- SC-3000 Cart Case Part 3 - First part of mold set
- SC-3000 Cart Case Part 4 - First half of mold greased and boxed up
- SC-3000 Cart Case Part 5 - Sprue holes / air vents
- SC-3000 Cart Case Part 6 - 2nd half set, remove nails and unbox
- SC-3000 Cart Case Part 7 - Seperating the mold halves
- SC-3000 Cart Case Part 8 - Pouring the first casting
- SC-3000 Cart Case Part 9 - First cast has set
- SC-3000 Cart Case Part 10 - First cast out of the mold
- SC-3000 Cart Case Part 11 - First cast trimmed and set
- SC-3000 Cart Case Part 12 - First black casting and 3D logos arrive from Shapeways
- SC-3000 Cart Case Part 13 - 3D logo mould and casting test
- SC-3000 Cart Case Part 14 - The first finished case with black top / bottom and SC-3000 Survivors logo
 color test samples - black, blue, green, orange
 color test sample - violet
Summary (2012)
Update: 29 Sept 2021 :We are no longer doing the custom moulded cases, but we now provide a 3D printed case with the Megacart and a cool vinyl label.
The following notes were from 2012, when we made the resin cases, so some of the comments are out of date. But that was heaps of fun, and the videos were very popular.
One thing - if you try to make your own moulded cases, WEAR EYE PROTECTION. You could damage your eyes badly if you splash some resin in them. And read any safety warnings on your casting products about ventilation and wearing gloves carefully.
Now that we have an awesome multicart, we need a source of cases. Unfortunately these haven't been manufactured for 25 years, so we are looking at different ways of getting some:
- Make a silicon mold of a SC-3000 cart case and create new resin casts
- 3D Printing
- Make a new injection mold and get them commercially produced
- Buy a bulk lot of cheap old games from Japan and discard the old PCBs
- Use some other readily available source of cases like Colecovision cases and adjust them to fit the SC-3000 / SG-1000
3D Printing is a very cool, awesome technology. You can do amazing things with it and there are now home 3D printers available for $500 to $1000 USD. But unfortunately commercial 3D printing is too expensive (approximate cost per case $65 to $100 USD). The home 3D printers are cheap to run (approximately $5USD in plastic materials per case), but they are slow in high detail mode and the quality and consistency just aren't there yet.
Check out the Solidoodle 2 and the Makibox to see how open source designs are being used and modified by small entrepreneurs to bring affordable 3D Printing to the masses. I know there are lots of RepRap projects around, but these are two cool examples of trying to make 3D printing much cheaper and easier.
A commercial injection mold is the best solution for volume manufacturing. But the mold costs something like $2000 to $3000 USD, and if you buy around 2000 cases then the cost per case is around $2 USD. So that ain't gonna happen any time soon :)
Buying a bulk lot of cheap of games from Japan is the most cost effective option for proper SG-1000 / SC-3000 cases. That probably works out about $7 USD to $10 USD per case by the time they are shipped. But you have the hassle of finding someone in Japan to buy them for you, and it is a shame to kill old vintage games if you don't have to.
You can actually use Colecovision cases on a SC-3000 / SG-1000 if you design a custom PCB and make a few cuts to the case. We've tried that and the end result is pretty good.
But we'd still like a real SC-3000 case if we can. So this project is mostly about silicon moldmaking and resin casting. At this early stage we have doubts that this is going to be viable for any volume of cases. But it sure is fun :) Read on to find out how we are progressing.
Adventures in Moldmaking... 2 Aug 2012
Hi All! It has been a while so I thought I'd share my latest project - making a silicon mold of a SC-3000 cart case and creating new resin casts.
I initially did a pile of research into 3D printing. I really wanted that to work as 3D printing is just amazingly cool. Richard Mayo from Protobuild (3D Printing and Design) was really helpful answering all my stoopid questions. Their quotes were competitive and I'd thoroughly recommend giving them a call if you are in NZ and need a 3D prototype created.
When it because obvious the cost would be prohibitive for a low volume / cost hobby project he suggested I try making a silicon mold and pointed me towards the good folk at TopMark Products in Ellerslie. They provide a lot of product to the film industry including the Hobbit and Spartacus. But they are also used to helping out hobbyists and artists and sculptors, so they cater to a wide range of people.
I picked up a pile of stuff from TopMark Products on Monday. They were very helpful and gave me some good suggestions - many thanks to Gabrielle and Alastair for their assistance.
I made my first test mold and cast last night. I'm pretty happy with it for a first attempt and I learned a lot.
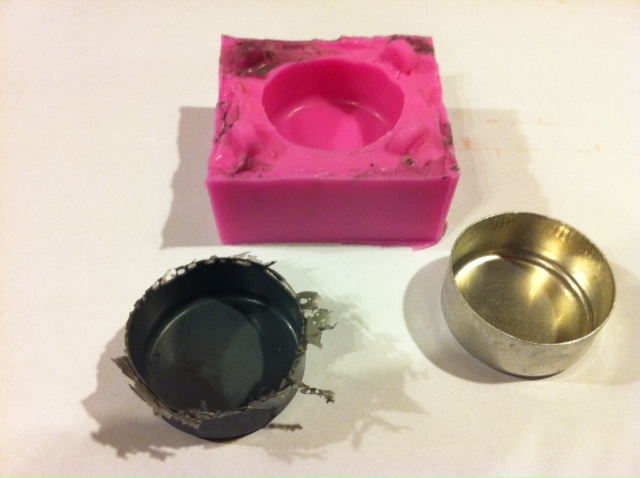
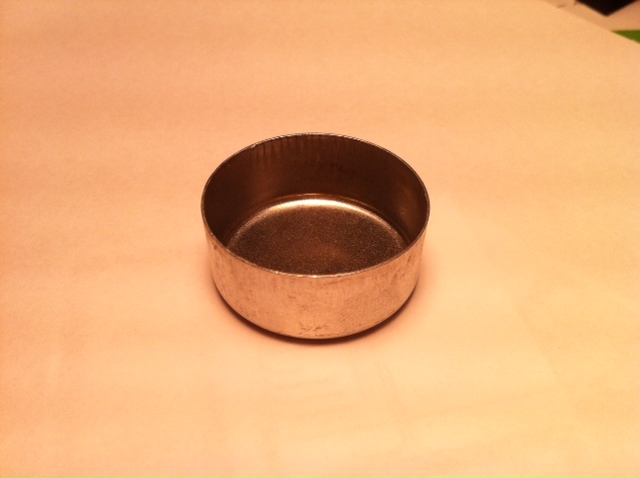 the solder tin we are taking a cast of
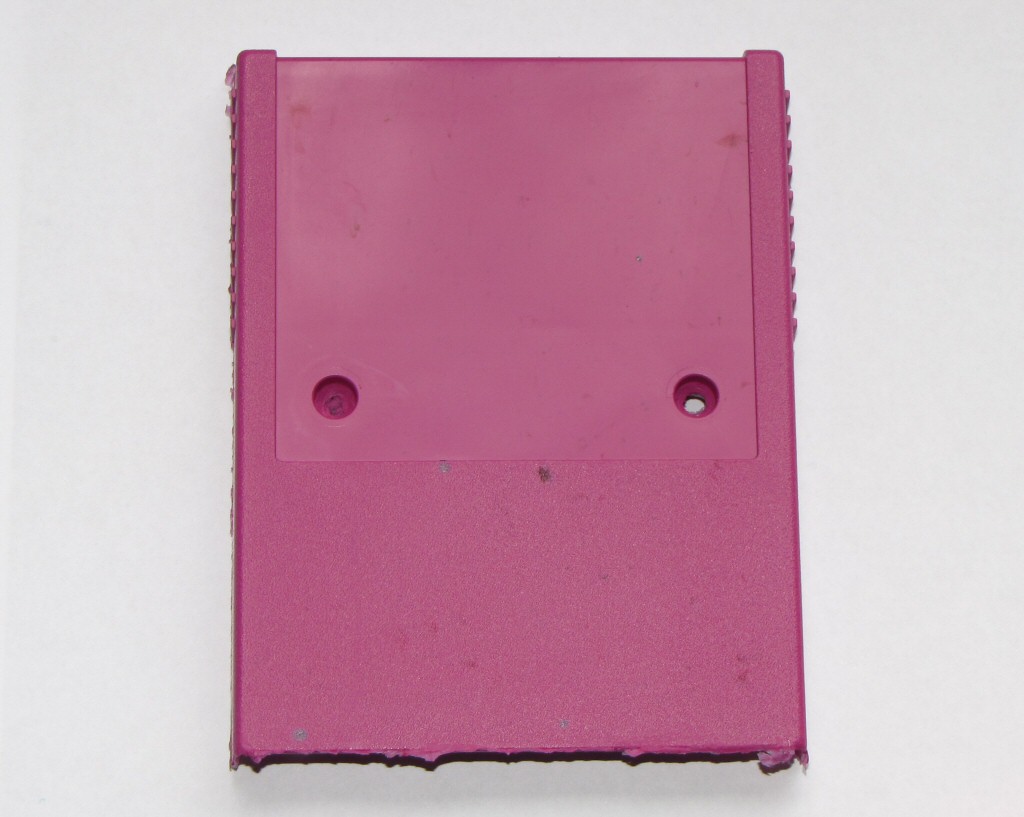
I needed to try something small, but which would let me test a thin walled object and a plug / squash mold technique. A plug or squash mold is one where you fill the bottom half with resin then insert the top half like a plug and squish the resin into place. This technique is well suited to casting thin walled objects like a games cart case.
So I used the solder sponge tin from my soldering iron. The walls on that are only about 0.55mm thick, which is a lot thinner than the cart cases (thinnest wall is approx 0.75mm, most walls 1.8mm to 2mm).
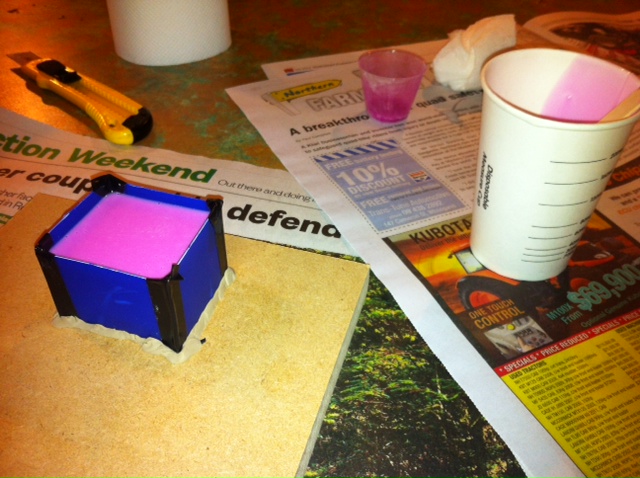
 mold box, pinkysil mix, tools etc.
I'm using Pinkysil, which is a platinum based silicon. It is thin, pours well, resilient, doesn't need degassing, holds detail well etc. It is also $128 NZD / kg (approx 900 ml) which isn't quite enough for the four mold halves I need, so I don't want to waste it. The soldering tin was small enough to not waste too much silicon. I used about 110 ml of my silicon for this.
Here is my work bench. Or the kitchen as my wife likes to call it :) You can see the Pinkysil bottles, mixing cup, and the poured mold (blue with pink inside it at left of screen).
 assembled mold box with pinkysil over part
Close up of the Mold box. You can't see it, but the soldering tin is upside down embedded into some Klassic Klay. I then used bits of ice cream container to build a Mold box around it. The bottom is sealed with Klassic Klay, then the Pinkysil is poured in. It sets in about 30 mins.
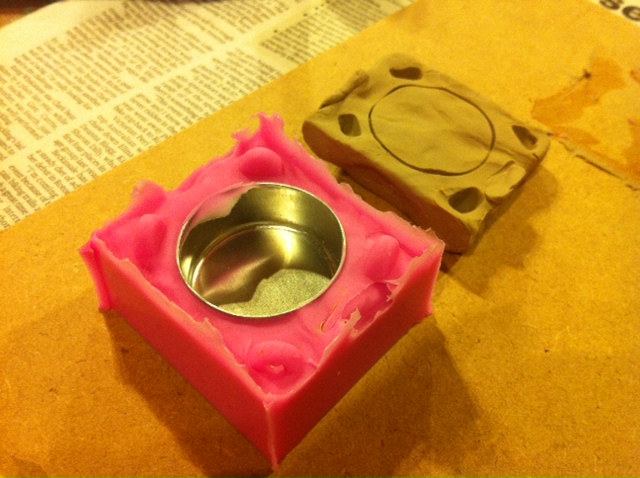 first half of mold and Klassic Klay
First half of the mold has set. I have removed the Klassic Klay which was on the bottom.
 second half of mold poured with sprue hole
Next step is to cover the first half of the mold in release agent (petroleum jelly). Then flip it over, rebuild the mold box, and pour the second half of the mold.
You can see here I'm using a soldering station to leave a sprue or air hole in the top half of the mold. Well, that was the plan. I forgot to set it up before I poured the mold and the silicon started to set before I remembered. So this first pass didn't have air vents. Oops. I will have to try to cut some later.
Update - make sure you put plenty of air vents in when you pour the mold because it is very hard to cut clean vents through the Pinkysil later on. The Pinkysil is soft and cuts easily with a sharp craft knife. But it is almost impossible to drill with a standard drill bit. The drill bit just slides through the silicon without removing any material and when you pull it out the hole closes up. And the silicon has a high melting point, so heating a nail up with a blow torch and poking it through didn't help either.
I eventually cut new sprue holes using a scalpel. It doesn't give the neatest hole, but it seems effective.
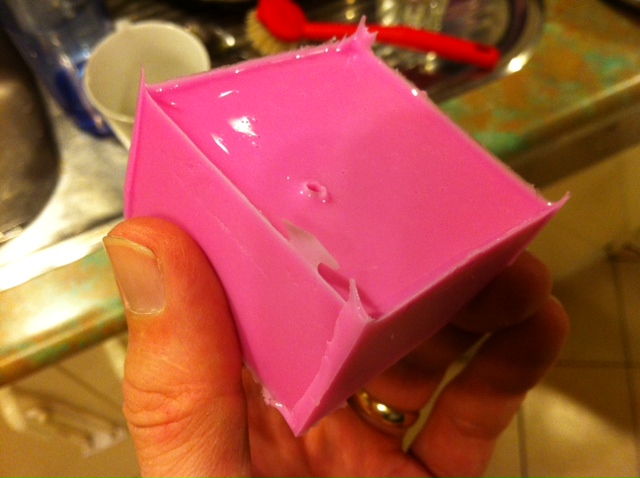 second half of mold set - where is the join?
I purposely went light on the release agent because I wanted to see how badly the new silicon would bond to the original silicon.
I may just buy one of the release sprays. They are about $30 - $40, but the vaseline was very messy to use and hard to cover the entire mold consistently. That is important, because the new silicon sure does stick to the old one.
Second half has dried. Where is the join? The new silicon ran down the sides and completely bonded the two halves. Next time I will spray the entire mold, not just brush the top. Or at least I will seal the sides of the mold to the mold box with vaseline.
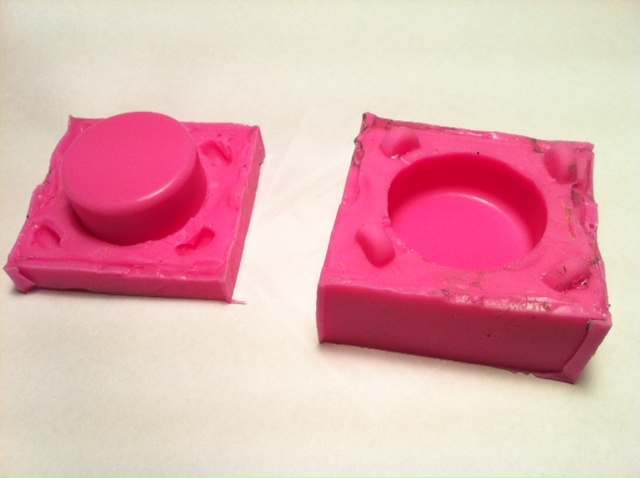 the finished mold
The finished squash / plug mold. The idea is you partially fill the base then squash the two halves together. The excess should squeeze out the sides and out the top air vents (which I forgot to put in).
 the finished mold
The squash mold in action. I made up some EasyCast resin and added some black pigment. EasyCast may not be the ideal choice for the molds as it may not be rigid enough and it is hard to tint to a nice black. I ended up with a gray finish. But it is very easy to mix and pour which is important for thin walled molds.
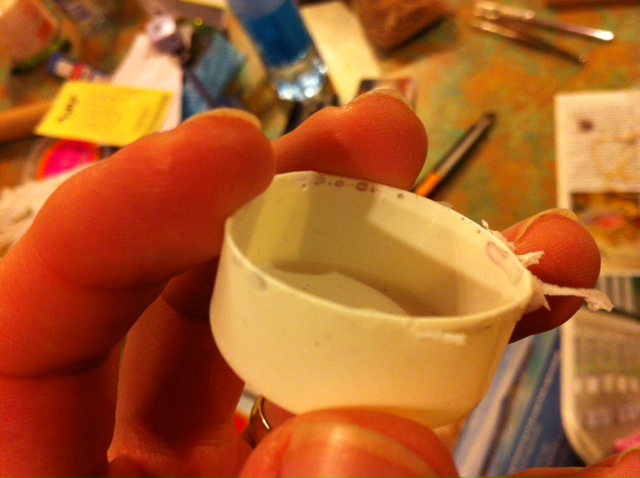
 the first casting
I left this about 35 minutes to cure. Easycast cures in about 15 mins, but thin sections actually take longer to set than fatter sections.
You can see the basic shape is ok, but I have inconsistent coverage at the top. Some air vents would have helped there.
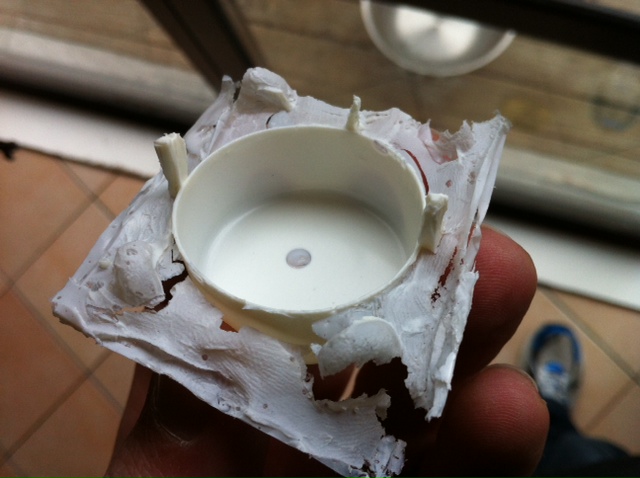
 the first casting
The finished cast. The shape is good, although we have significant air holes. Ignore the flashing - that is supposed to be there with a plug mold, and it cuts off easily.
The end result is too flexible although it stiffened up a little bit overnight. It will be interesting to see if the cartridge cases are stiff enough, or if I need to look at a different product. As I said, the walls on the soldering tin cast are only about 0.55mm thick, which is a lot thinner than the cart cases (thinnest case wall is approx 0.75mm, most walls 1.8mm to 2mm).
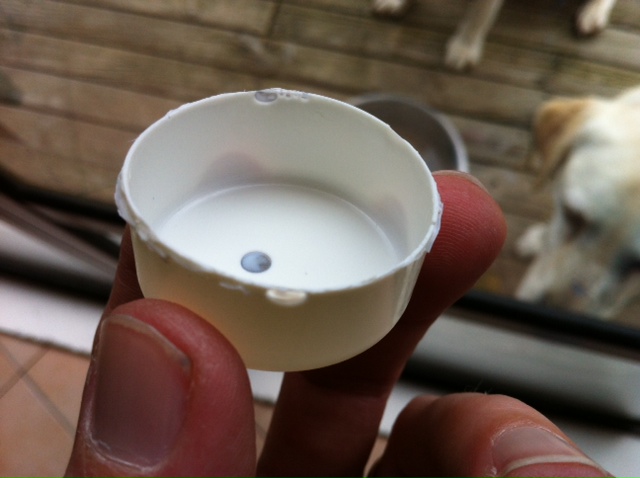
 the second cast - looks good! only minor air holes
Update: 5 Aug 2012 2nd & 3rd Casts
I cut two missing air vents into the top of the mold and did another test cast. The second test was much better, with only a couple of air holes. Ignore the flashing - that is supposed to be there with a plug mold, and it cuts off easily.
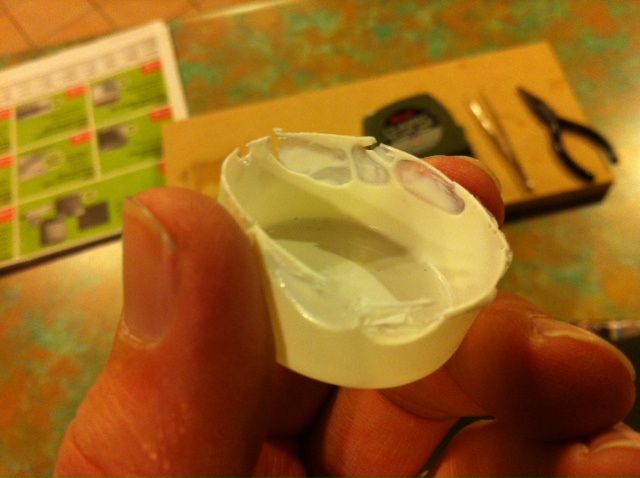 the 3rd cast - AAAGGGHHH!!!
So if two vents are good, then four is better, right? So I cut two more vents and tried again.
This time the result was worse. MUCH worse. I need to figure out if that is due to poor placement of the extra vents or some other reason like not placing sufficient resin in the base of the mold before joining the halves together.
 3rd cast - AAAGGGHHH!!! from another angle
This time around I also tried to coat the top of the mold really well so I didn't put much in the bottom half. And I think that tear at the base is a giveaway there wasn't enough in the base. However there was plenty of resin coming up through the air holes so I thought I'd be ok.
 4th cast - I'm getting worse at this... but I think I know why
Attempt #4: I mixed up extra resin, coated both the top and the bottom of the mold, gave the mold a good squeeze, and rotated the plug around a bit to squeeze all the air out, then bound it up tight with rubber bands.
Oh, God, I'm getting worse. This cast *really* sucked. GRRRRRRRSTOOPIDFFFFFINGBLOODYRESINANDMOLDINGSHITCRAPIT
 5th cast - let resin pool nicely on top of air vents
Attempt 5: After some reflection, I think I've figured out where I've been going wrong. I've been trying hard to squeeze and jiggle the mold to remove any trapped air. But all that does is distort the mold and make those air pockets worse. So I need 4 things:
- Use plenty of resin - don't be stingy
- Use a thin stick (kebab skewer) to work resin into the edge seats in the top half of the mold
- Only apply gentle pressure to the mold - just enough to seat the top nicely into the bottom. Then leave it. Do not use any additional weight or rubber bands to force the mold closed
- Make sure the resin flows freely through all the top air vents and leave a pool of resin on the top of the mold. That seems to help the air bubbles travel up and out of the mold
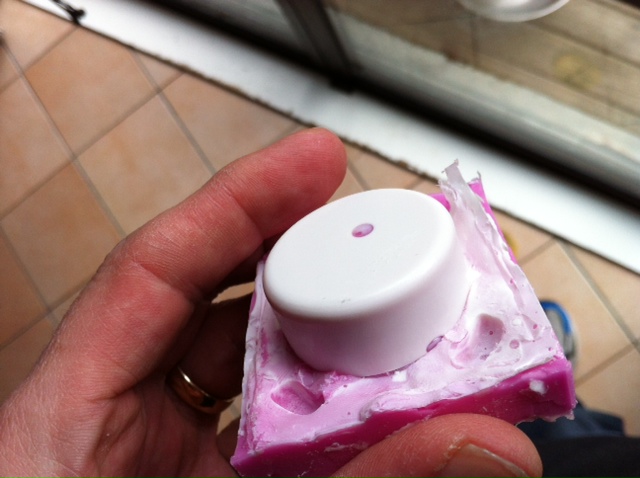 5th cast - a solid B+ Finally!!!!
 5th cast - a solid B+ Finally!!!!
 5th cast - a solid B+ Finally!!!!
So we present Attempt 5. I've finally got good coverage on the top edges of the pot. The air hole in the base is new, but I can work around that. Yay!